nobis opus splendeat: we need more glitter

Posts tagged ‘laminates’

how does your garden grow?

Mine? Not so well. But I look pretty doing it!

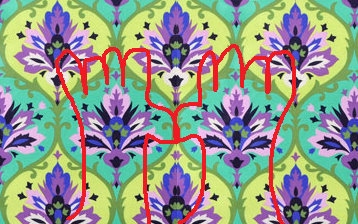
This year I made some new gardening gloves from Amy Butler Love home dec and laminates. I drew an outline for the gloves (I still have to get better at this part… some of my glove’s fingers are pretty wonky…) and centered the glove pattern right over the main repeat… sorta like this.

Have I mentioned lately how much I love that designer fabrics are becoming available in different materials? Oh, I have?

Anyways, sew them together, right sides facing. Do exactly the same thing on the laminate, and then slide the inside out home dec inside the right-side-out laminate part. Turn the edges in and sew!

And lucky me, my apple blossoms were blooming… and full of bees.

Sewing Buddy 2012 Challenge #1

Whipstitch has this wonderful thing every year called the “Sewing Buddy Project” where you’re (seemingly randomly) matched with another participant and they’re your “buddy” for the year. Somehow I’ve gotten matched with a buddy from Georgia for 2 years in a row!

This year there are going to be challenges for buddies to complete jointly – the first one ended today.***ETA: it looks like it’s been extended until Monday!*** The challenge #1 was to create 2 projects, one a “boy” version and one a “girl” version. Since children’s clothing is pretty much out the window for me, we had to come up with something else that could be portrayed in a “girl” and “boy” fashion, but that was still obviously connected.

We decided on a self-contained picnic blanket in the greenhouse apple chevron print. I did mine in flannel and laminate – she chose to go with cotton instead of flannel for the heat factor! I love that these designers are producing on so many different types of fabric, it really allows you to be some much more flexible with what you can create!

So anyways (I finished it at close to midnight last night so I couldn’t take it outside for pics, but it’s been raining here anyways.) I chose 4 solid flannels to co-ordinate with my apples. She provided the pattern (which I managed to screw up anyways) and I came up with a block scheme for the pocket.. well, 2 schemes. I couldn’t decide on just one.

I decided that since both sides of the pocket show, that I’d do one on the inside and one on the outside.

What do you think? Does it look like the sketches at all? You might notice that the middle row is on top and the top row is in the middle. And please don’t look at the puckers where the designer flannel didn’t stretch and the cheaper solids did stretch. Just gaze in awe that in the first try at assembling it, it all ended up fitting inside the pocket!

But what they say about quilting is true… you really have to love the fabric that you’re working with. And at the end of it I still love all of the fabrics!

Prince Charming shower curtain

When I saw Tula Pink’s new Prince Charming fabric in LAMINATES, I almost lost my cookies. I was so excited, I love frog designs and I thought it was perfect for my bathroom. We’re expecting to renovate the bathroom soon, and I’ve finally found my color palette!

So anyways, here’s what I decided to do: the Prince Charming shower curtain!

This was my first time actually working with laminates… I’ve looked at them and drooled over them a whole lot, I’ve even purchased them before, but this time I actually did it. I dug up some masking tape and covered all of the fabric-facing metal on my machine.

And away I went. The print faces along the bolt, so as you unroll it the heads are at the raw edge and the froggy-bums are at the roll. So I cut about 6 feet of the darker print off of its roll, cut it in half, then cut about 6 feet of the lighter print off of its roll and cut it in half too. Then I just pieced 3 of the pieces together and had one left over (I think it’s going to be destined for coordinating cosmetics bags, as is the yard or so left on each of the rolls!)

To stitch the pieces together, look at the below diagram that is a picture of two pieces of fabric as viewed in a cross-section from the bottom (or top) of the curtain. The edges were left raw, but a double line of stitching centered in the middle of the overlap seemed to do the trick.

What went well:

  • laminates are so simple to work with because you don’t NEED to hem them.  I left every single edge raw and it’s beautiful.
  • the grommets I used were from Walmart and came with little templates and worked flawlessly.
  • laminates LOVE to be shower curtains because they’re beautiful like quilting cotton, but waterproof so no lining!!!
  • I’ve got a shower curtain rod that bows out so I made my curtain a little wider AND a little longer than a normal curtain.

What didn’t go so well:

  • despite my use of masking tape on my presser foot, the top still pulled more than the bottom, you can probably see it in the picture.  Granted, I didn’t use my IDT, I’ll probably try that next time. I didn’t pin it because I didn’t want to make holes in the laminate, so that might have helped as well.